The Most Effective Trail Camera Plan for Deer Hunting
Posted 2017-08-07T19:07:00Z
Do You Use Any of These Trail Camera Tips?
")
Prep Your Cameras
I'm an average Joe hunter, just like you. I can't afford to go out and buy a battalion of Bushnell Trophy Cam HD Wireless cameras. It would be nice. They're fine cameras. But it isn't feasible. Instead, make due with what you have, but make sure your equipment is in top condition before putting it out.
Things to remember:
- Replace old batteries.
- Wipe battery contact points clean.
- Ensure cameras seal well.
- Empty and format SD cards.
- Check cameras settings (date, time, etc.).
Understand Coverage Areas
Trail camera efforts aren't effective unless you have adequate gear. You need enough cameras to effectively cover the land you hunt. Some sources recommend one camera per every 100 acres. In a perfect world, that's enough to capture most bucks, as their home ranges often average out around 600 to 650 acres. But we don't live in a perfect world, and I don't follow the 100-acre rule.
")
Personally, I don't worry so much about how many acres I have per camera. Instead, I look for the best locations — with the highest odds of capturing photos of deer — to post cameras. That might mean I have one camera on 100 acres. That might mean I have three cameras on 100 acres. It always differs.
Know Where to Focus
This is the snag people often get caught up on. Have the right mindset based on the time of year. That's essentially what you're doing. You're hunting them with a camera. Take advantage of their seasonal behaviors.
Food is king. Focus on it. Remember water, also. And certainly don't forget bedding and security cover. You know the property you hunt better than anyone else. Look for these things. Beyond that, look for trails that deer frequently travel along. Set up along those routes where deer are forced to pinch down.
Positioning the Camera
Positioning of the camera is very important. You need quality photos to distinguish different deer, and you can achieve that by effectively arranging your cameras.
Keep in mind the following things:
- Hang cameras at waist height (3 to 4 feet).
- Don't angle cameras pointing too high or low.
- If on trails, angle cameras at 45 degrees.
- Secure cameras down tight enough there is no movement.
- Knock down all limbs, grass, and debris in front of the camera.
Notice that I suggested 3 to 4 feet for trail camera height. Sometimes I follow that; sometimes I don't. It depends on how well my cameras are camouflaged. If they are concealed well at that height, I leave them. If not, I hang them higher (6 to 7 feet) and angle them downward.This will keep your cameras off their radar, as they rarely look up at cameras like they do when they're at eye-level.
Ways to Distinguish Bucks
You need to be able to distinguish one buck from another. Most times, it's easy to do. But sometimes it's not. Here are some of the physical characteristics that make it easier:
- Facial coloration,
- Fur patterns,
- Fur coloration,
- Scars and markings,
- Body size,
- Antler spread,
- Antler mass,
- Tine length, and
- Abnormal points.
")
Ways to Spook Less Deer with Your Trail Cameras
Trail cameras are extremely innovative. But they can be extremely ineffective if used improperly, too. Are you spooking deer with your trail cameras? Odds are high that you are unless implementing these seven tactics.
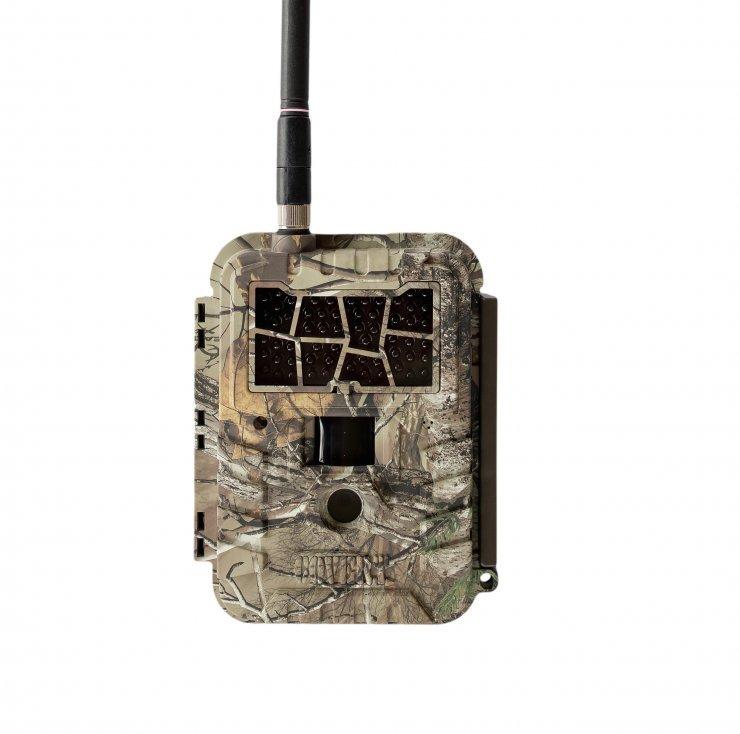
- The age of big, bulky cameras is over. They're too noticeable. Those larger models also seemed to be louder models. If you want to spook less deer with your cams, use smaller and quieter models. That's the first step in keeping deer off your radar.
- Forget the flash cameras, too. Choose LED models. This will help reduce the number of deer you alert to your cameras. Keep your cameras more covert with this simple tip.
- They don't put Realtree camo on cameras for no reason. Buy cameras that have camouflage on them. This will help conceal cameras.
- Take the camo option one step further and brush in your cameras. This will make those camo cameras even harder to detect. And if you want to go all-out with this, do something as shown in the photo above. That's hard core.
- Don't hang a camera in a deer's line of sight. Hang them up high where they're out of view. As the old saying goes, Out of sight, out of mind. The same goes for trail cameras and deer.
- As always, scent is very important. Reduce it as much as possible by spraying your cameras down after handling them. Also, wear gloves when checking them and keep the wind in your favor when doing so, too. These also are things you can do to spook less deer.
- This is likely the best tip on this list for keeping deer from detecting your cameras. Put them in locations that you won't spook deer when checking them. Don't hang cameras in or near bedding areas. Instead, hang them on food sources, water sources and other locations that won't take you close to bedded deer. Then, only check them when you know deer won't be up on their feet.
Think Effectiveness vs. Invasiveness
It's important to be smart about how you use your trail cameras. You want to gain the scouting intel you need without alerting deer to your presence. That's why I use reserved tactics first, and then I move in deeper. But always use strategies to reduce pressure whether your approach is low-impact or high-impact.
How to Home in on a Buck
For the last several years, I've used a tactic that I call blitzing a buck. I use it when I know a buck is in the area, but I'm not certain on how or where to kill it. This method generally answers that question for me. It generally takes seven to eight days to really get a feel for what a given deer is doing. Yes, it's aggressive. But it works.
Step 1: If you already know of a buck in the area you want to target, skip this step. But if you don't, the first step is to find a deer. Whether that's while you're in the stand hunting, hunting from an observation stand, or simply scouting from afar, you need to lay eyes on a deer.
Step 2: Now that you've seen the deer you're after, connect the dots. Make an educated guess as to where this buck is bedding, feeding and going to water. Write all of it down on an aerial map. This is an important step. It'll help you decide where to hang your cameras.
Step 3: Now that you know of a buck in the area, and you've made an educated guess on where it's living, gather as many cameras as you can muster (four to five is optimal). Look at the aerial map that you've marked up and determine where you should hang your cameras. Don't get too close to where the deer is bedding. This is an aggressive tactic, but you don't want to take it as far as to spook the deer you're hunting. A buck's home range is approximately 600 to 700 acres, but its core area will generally only be 50 to 60 acres. I start out by making an educated guess as to where the buck's core area is and surround it with cameras. Leave the cameras untouched for three to four days.
Step 4: The goal by surrounding the deer's core area is to try to determine which end it's spending the most time on. After the four days are up, check the cameras. Leave any cameras that captured the deer. Pull cameras that didn't produce and move them to a new spot closer to the camera(s) that had photos of your target buck(s). Give it two to three days.
Step 5: Check cameras again. You're hoping to get the deer on most of the cameras by now. Repeat step No. 4 and move any cameras that didn't produce closer to those that did. Leave in place the cameras that did produce photos during steps No. 3 and/or 4. Leave the cameras alone for one to two days.
Step 6: This is (hopefully) the last camera check before moving in to hunt. By now, you want to be seeing your target buck(s) on at least one or two of the cameras you have out each day. Don't worry if they're not daylight photos as long as the buck is hitting them close to daylight hours.
Step 7: Now you have the intel needed to hunt. You have a good idea of where the deer is bedded during daylight hours and where it's going to feed. All that's left is to hunt the deer. It's best to wait for ideal conditions such as a cold front, dropping temperatures, rain events, good lunar positions, etc. But if those aren't on the horizon (within the next day or two), go ahead and hunt. You don't want to wait until the peak of the rut hits, as the deer will likely change its patterns by then.
How to Catalog Your Trail Cam Photos
Trail cameras have become one of my most useful tools when scouting for deer. Yes, I still scout for deer in a variety of other ways such as from afar, in the field and with maps. However, I do rely on trail cameras much more than I used to.
Sometimes I feel that's a bad thing. Sometimes I don't. In part, I feel the age of trail cameras has resulted in less woodsmanship among hunters. I'll be the first to admit that I don't get out there as much as I used to. On the flip side, I realize how effective trail cameras are and they'll forever be a significant part of my scouting endeavors each year. Cameras offer a variety of advantages, and as a deer hunter who enjoys filling tags, I'm not about to give up the undeniable benefits these pieces of tech provide.
Because of that, I now use a lot of trail cameras. I generally purchase two to three new cameras each year, and the size of my camera arsenal has grown exponentially. The number of trail camera photos I click through each year is massive because of it. And when you're as OCD as I am, you just have to have a system to keep all those photos organized.
I accomplish this by using specific folders and subfolders to house the mass of photos. I have hundreds of thousands of trail cameras photos on file and I'm able to navigate them fluidly because I keep them organized with the following folders.
")
Folder Title Example: Whitetail Trail Camera Photos
This is the first folder. Everything else will be found within this initial click of the mouse. I generally keep this folder (and all its contents) in My Photos. There's typically plenty of storage on most modern computers.
2. Sub-Folder: Broken Down by Year
Folder Title Example: 2015 Season
These sub-folders are placed within the Whitetail Trail Cam Photos folder. I have one folder for every year dating back to the first trail camera I have from the early 2000s. Within those folders are all of the photos I received during that particular year and season.
3. Sub-Folder: Separated by State
Folder Title Example: Kentucky
This group of folders are broken up by state (this is for those who travel to hunt), and go within their respective year folder. For those who hunt in-state only, change the states to counties.
4. Sub-Folder: Organized by Property
Folder Title Example: The Green River Farm
Then, within each of those folders, will be a folder for each individual property that you hunt within that county or state. Give each of these properties a name if you haven't already to identify them.
5. Sub-Folder: Labeled by Date
Folder Title Example: 09-15-2015 (creek stand)
Lastly, the folders that actually have the photos in them. In this last folder I put folders titled with the date I pulled the card and the location of the camera in parentheses. All of the photos from that card pull go in that folder.
Bonus: The Buck Folder
In addition to housing each card pull, I also save a copy of every individual buck I receive a photo of. Each of those go into a folder with all of the unique bucks on that piece of property. So within the folder for each location (sub-folder No. 4), I put a folder titled +Bucks. Adding the addition symbol keeps that folder at the beginning instead of being buried down the line somewhere. Any punctuation mark will work. This will not be necessary for those using a Mac, as you can drag the folder where you want it.
How to Properly Store Photos
We should always be extremely careful with how we house our trail camera photos. Keep one copy of all photos on a computer using this system or a rendition of your own. Back them up on an external hard drive. Keep the hard drive stored in a cool, dry area and back up the photos on your computer regularly.
I don't delete trail camera photos. And using this method has kept my trail camera photos organized for years. Use it if you wish. Create your own rendition. Don't do anything at all and dump them all in one pile. Simply delete them. That's up to you. But if you came here looking for a way to organize your photos without spending any money, I hope you found what you were looking for.
Are you a deer hunter thirsty for knowledge? Check out our stories, videos and hard-hitting how-to's on deer hunting.