How to Build a Turkey Spur Skinning Knife
Posted 2022-05-30T08:39:00Z by
Show off your gobbler's hooks in style with this easy-to-make hunting blade
Every turkey hunter loves a long, sharp spur. And we love to show those spurs off on necklaces, key chains, hatbands, and meter-long assemblies of hooks. But what about turning the leg of your trophy tom into a useful hunting tool? This knife, crafted with a turkey leg handle, is easy to build, looks great and will be a constant reminder of your successful hunt. Keep it in your turkey vest and use it to skin out your next trophy bird, or craft a full set and keep them in your kitchen for your next wild game meal.
For the best balance, and because a turkey leg doesn't provide much room for a large blade, you will need a small blade, something around 3 to 4 inches long, with a narrow tang that's at least 2 inches long to extend into the leg. If you find a blade you like on another knife, see if you can remove the handle to use it. If the tang is too thick to insert into the leg, you can use a file or grinder to remove enough metal to allow it to fit. If you end up using a grinder, frequently dip the blade into cool water as you grind to avoid overheating and ruining the temper of the steel. But an even better choice is to hire a blacksmith to forge a custom blade for you. High-carbon steel like 1080, 1095 or 1084 makes a tough blade that takes and holds an edge. Once you've chosen the ideal blade, you can get started.
(Don't Miss: Is Your Deer Bait Killing Turkeys? / What's Causing Poor Hatches of Turkey Poults?)
Editor's note: Please check out Michael Pendley's step-by-step instructions for this DIY project. – S.H.

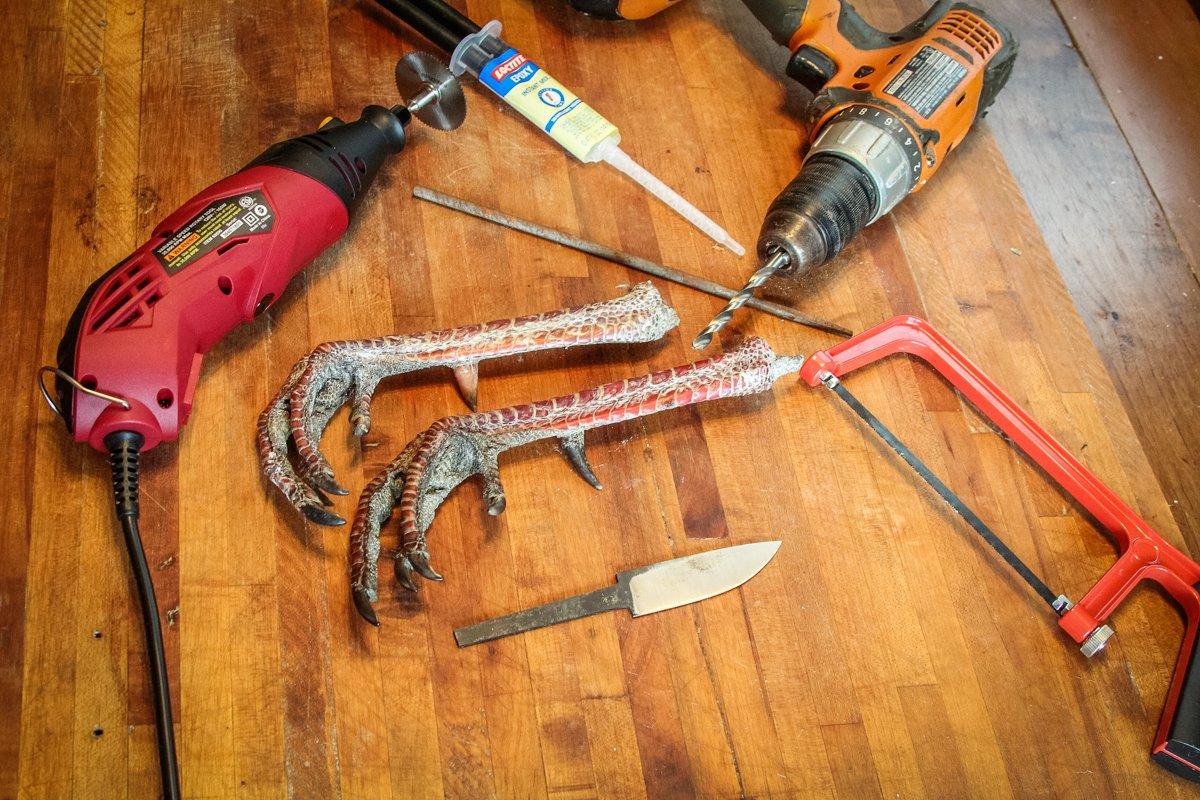
Here's what you'll need:
- Fine-toothed hacksaw or Dremel tool with cut off blades
- Cordless or power drill with sharp 1/4-inch drill bit
- Round file
- Clear epoxy in a syringe-style applicator
- Sandpaper
- Clear, spray-on polyurethane
- Painter's tape
(© Michael Pendley photo)
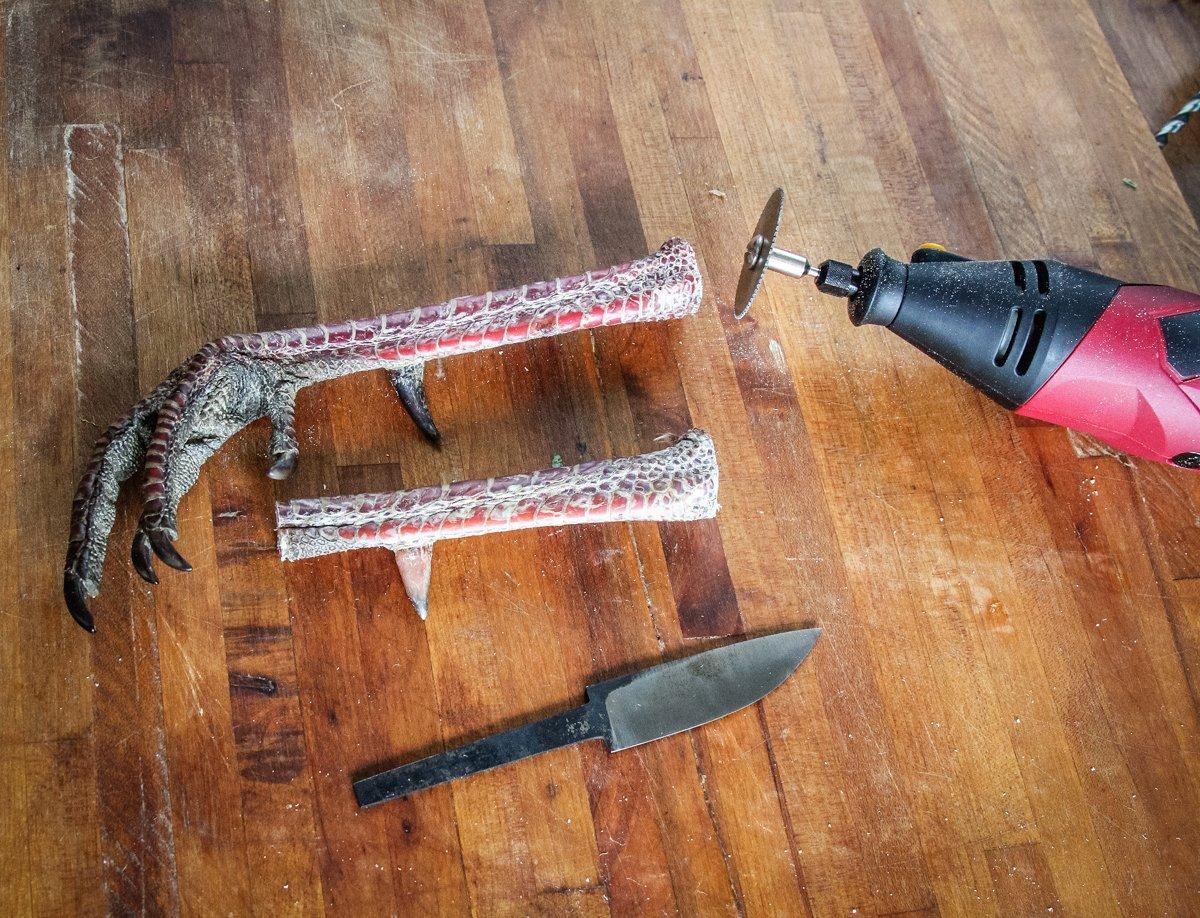
Prepare the leg. With a hacksaw or Dremel, remove the leg just below the knee. Choose foot-on or foot-off for your handle. Leaving the foot-on is more decorative, but removing it creates a more traditional knife handle that's easier to manage. If you decide to remove the foot, detach it with the rotary tool or saw, leaving an inch or more of leg below the spur. If you go without the foot, the blade can insert from either end so that the spur is either near the top of the handle and rests between your pointer and middle fingers when you hold the knife, or at the bottom of the handle so that it rests below your hand. Note the bone below the spur is narrow and will split easily if an oversized tang is forced in from that end. If you decide to keep the foot, the spur will be at the bottom of the handle. Dry the handle by covering the leg with Borax and leaving for at least two weeks. A turkey leg will shrink as it dries, and it can split around the tang if you try to build the knife too soon.
In order to prevent the scales from flaking off over time, dry the leg in a cool, arid environment. An air-conditioned room works well, as does a freezer. In either case, leave the leg in an open box so that moisture can escape and pack any cut ends with Borax. If you prefer the bare bone look of a skinless leg, you can remove the skin before drying the leg, but leaving the skin on makes for a tougher knife handle.
(© Michael Pendley photo)
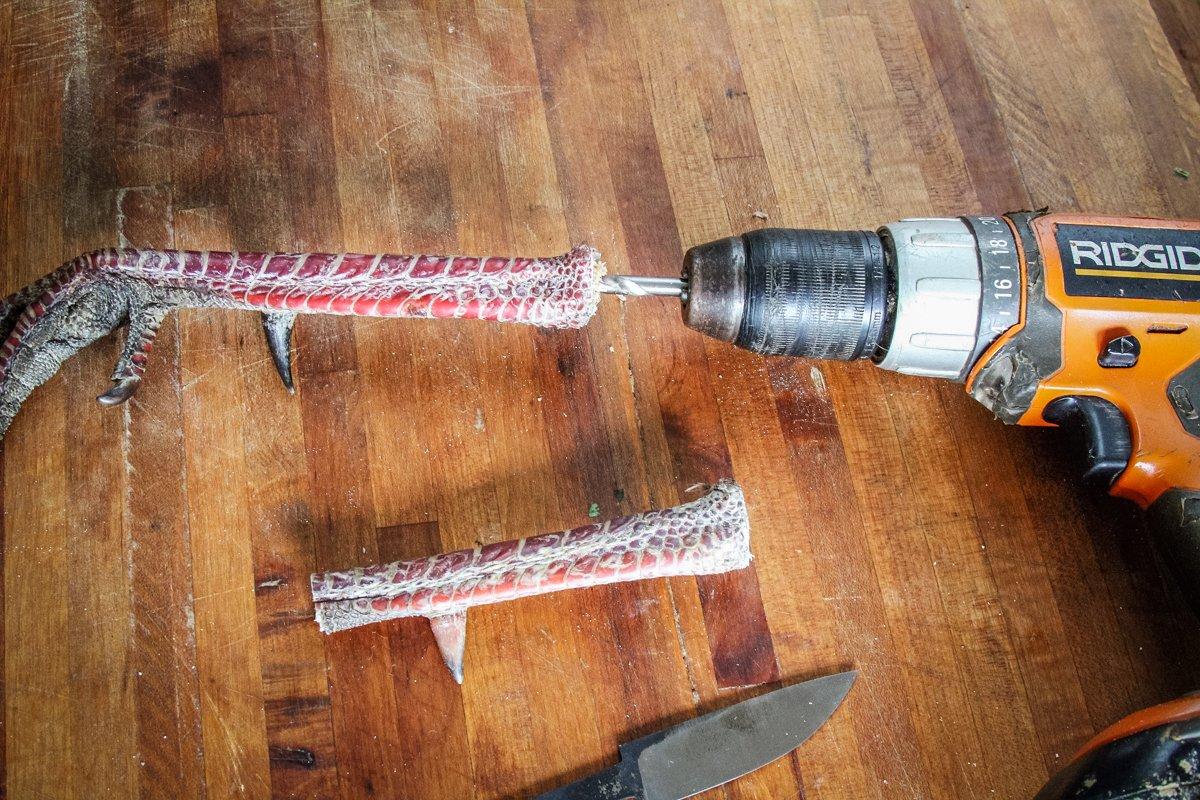
Drill the leg. If you have removed the foot, pick the end of the leg you prefer for the top of the handle. Carefully drill a hole into the center to accept the knife tang. Go slowly to avoid running the bit at an angle and through the side of the leg. Check the fit by inserting the knife tang into the drilled hole, and carefully enlarge the hole with the round file as needed until the tang slides in and out easily.
Sand any rough spots on the top or bottom of the handle for a smooth feel in hand.
(© Michael Pendley photo)
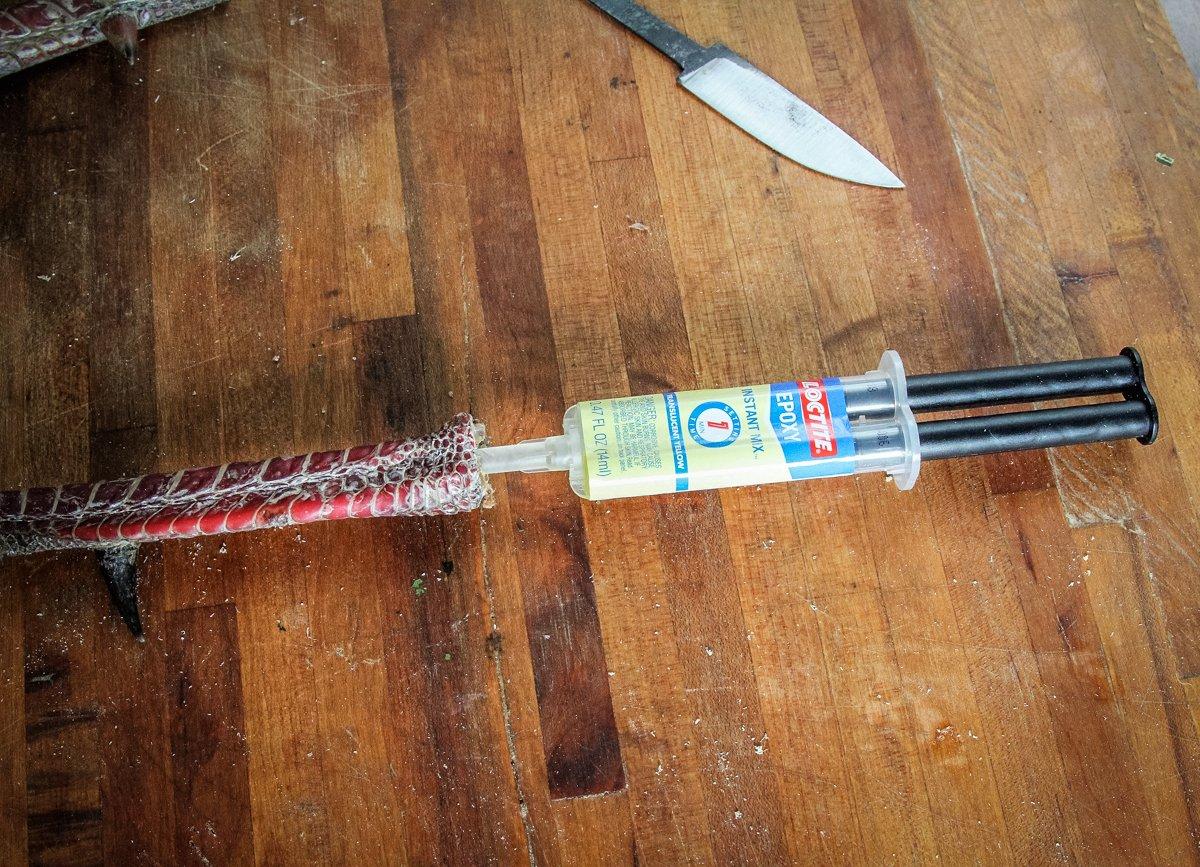
Fill the drilled hole three quarters full with clear epoxy. Overfilling will result in excess epoxy running out when you slide the tang into the handle. Quickly wipe away any epoxy that does run out with a clean cloth. If you removed the foot from your handle, cover the bottom of the leg with a layer of epoxy to seal it and prevent moisture from entering the handle.
(© Michael Pendley photo)
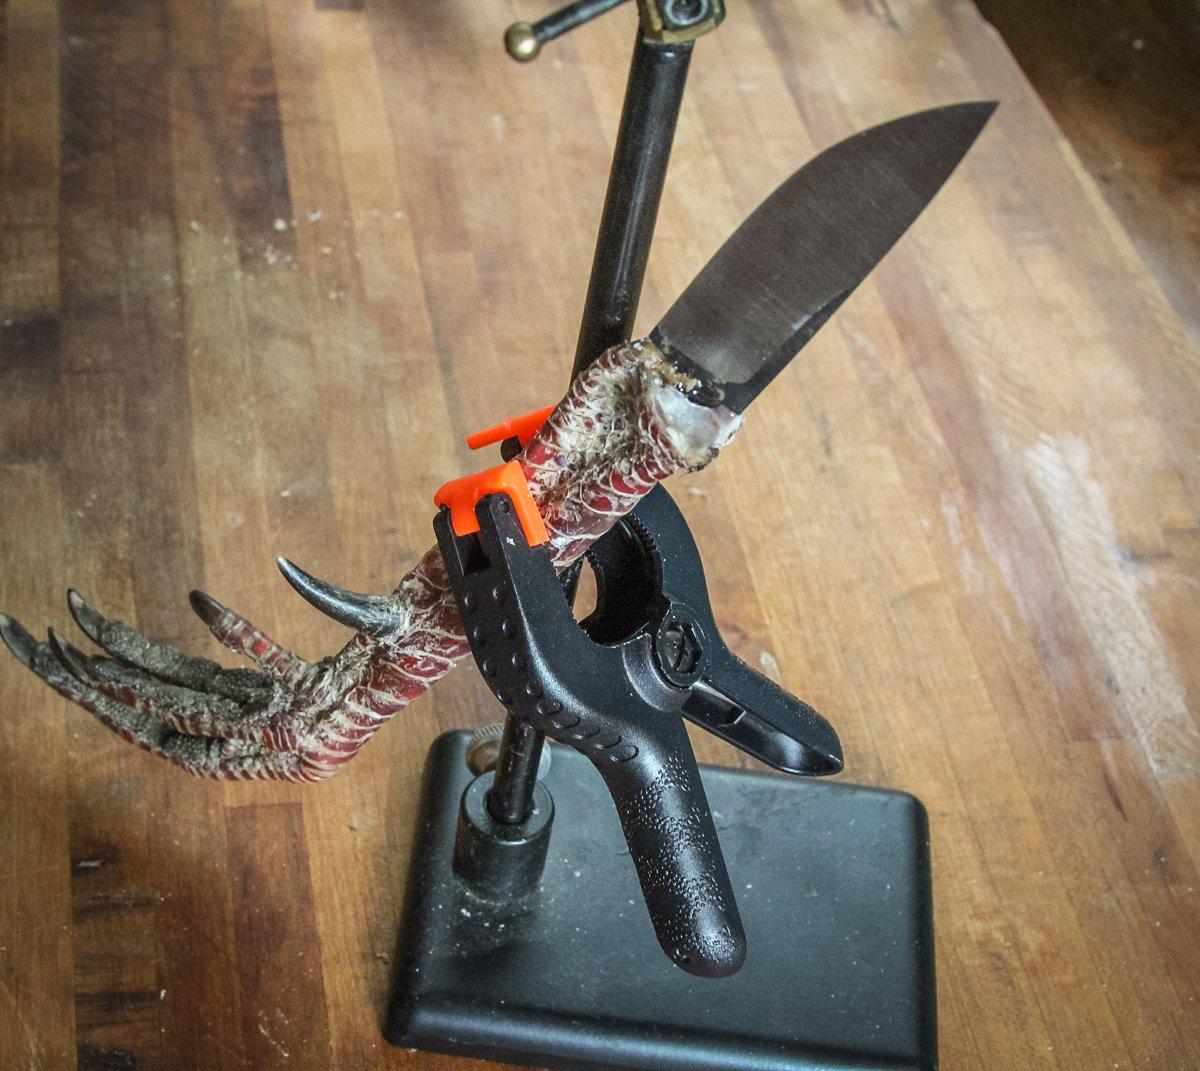
Use a spring clamp or tape to mount the knife vertically overnight (blade up) to allow the epoxy to cure.
(© Michael Pendley photo)
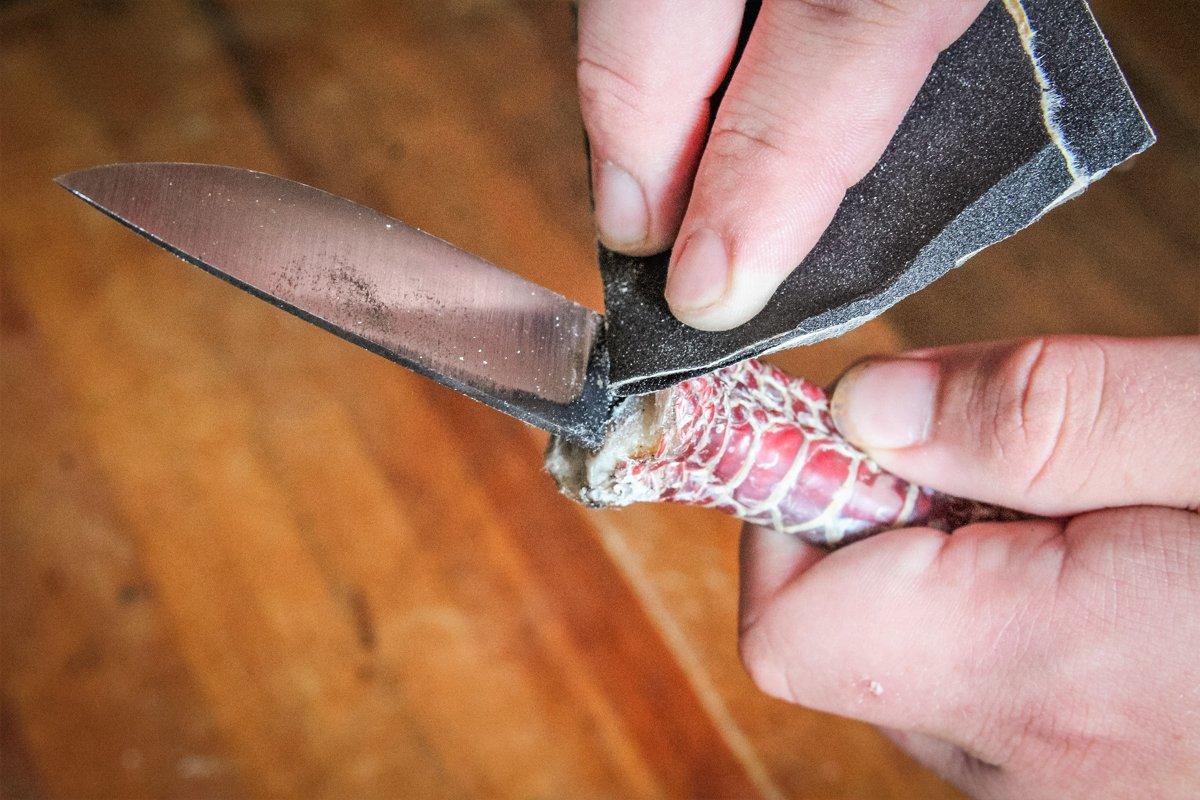
Once the epoxy has cured, use sandpaper to smooth away any hardened epoxy remaining on the outside of the knife handle or blade.
(© Michael Pendley photo)
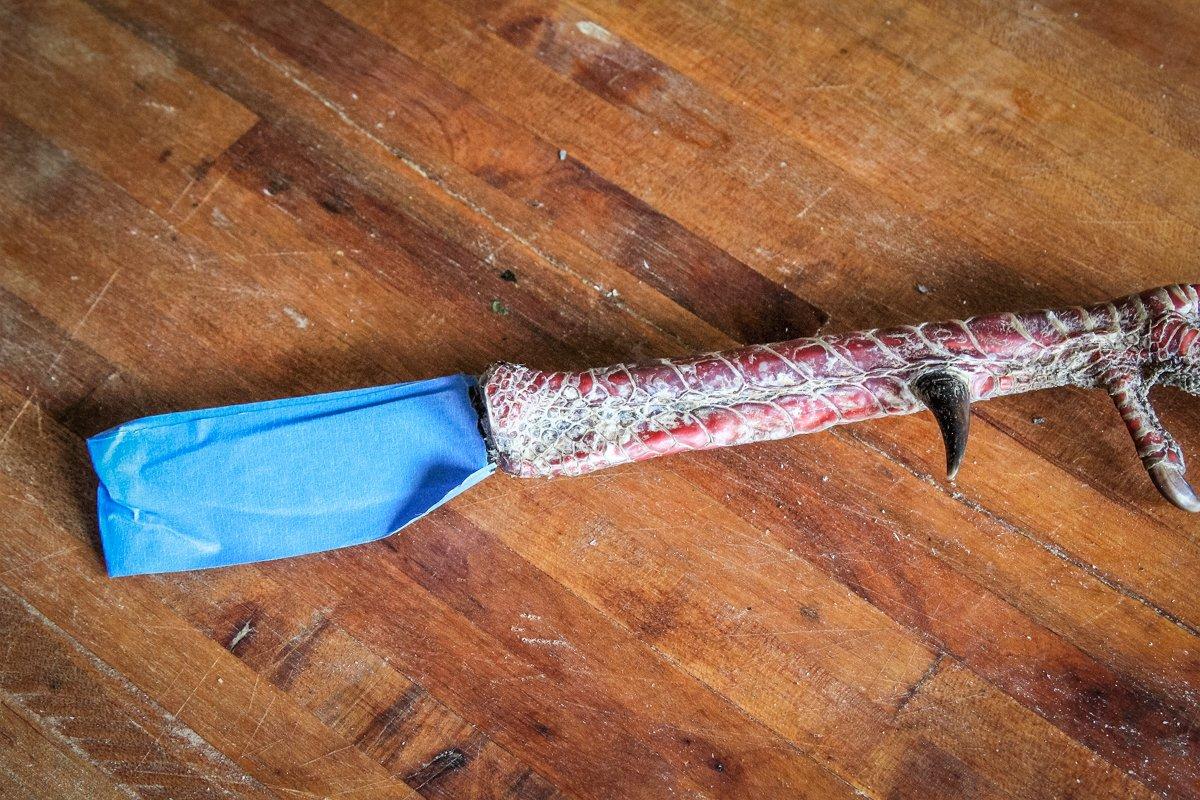
Cover the blade with painter's tape to protect the steel, and spray the knife handle with polyurethane to protect the leg and give it a pleasing appearance. Applying multiple thin layers of polyurethane will protect the handle during use and help prevent the scales from loosening and flaking off over time. Allow each coat to dry completely before applying the next layer.
(© Michael Pendley photo)
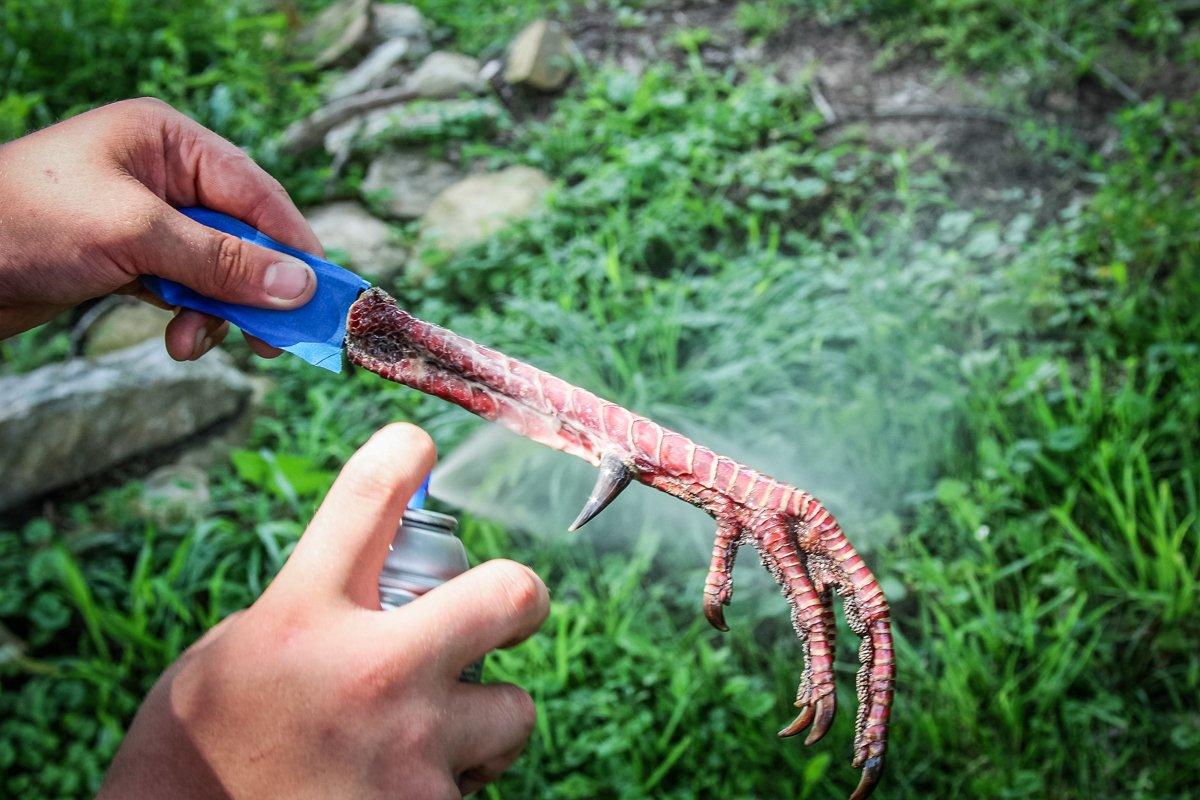
Spray the leg with clear polyurethane to make the handle waterproof and to bring out the colors of the leg.
(© Michael Pendley photo)
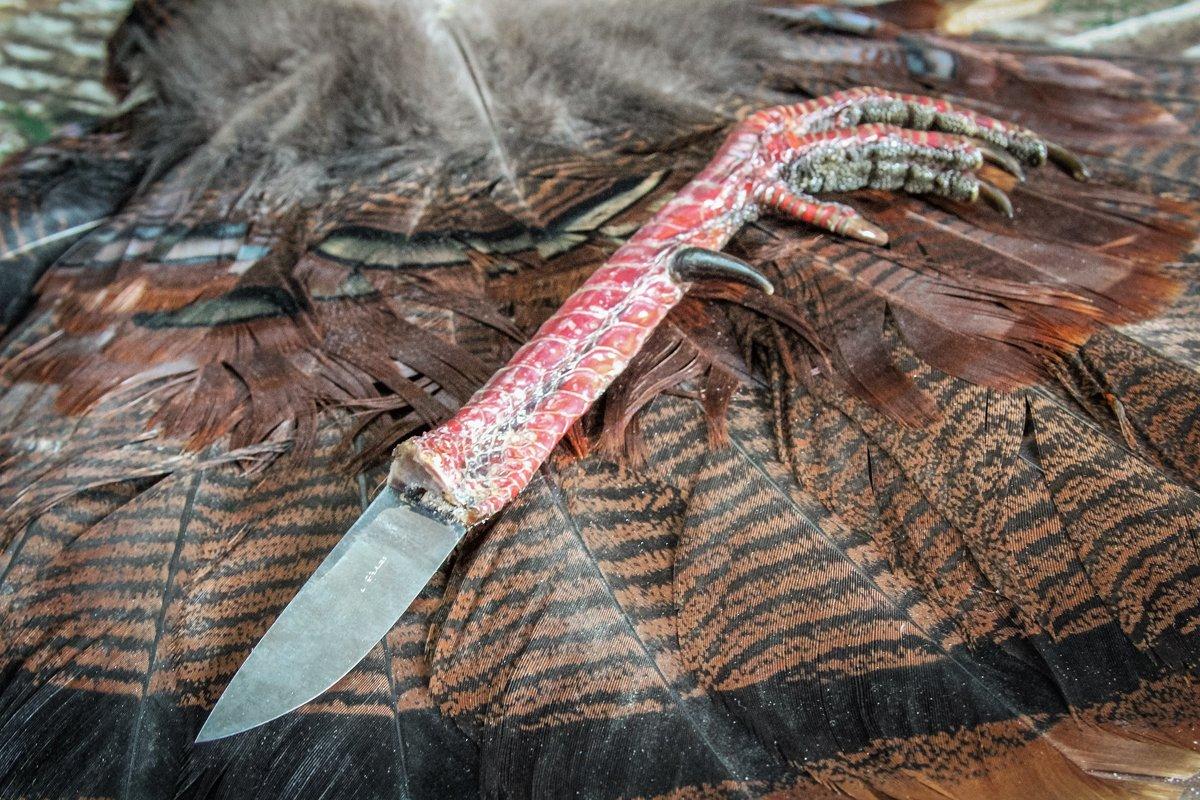
Put a keen edge on your new knife and use it to clean your next bird. You can craft a sheath from leather or Kydex for your finished knife, or simply order one from the many sources available online. Some makers will even custom fit a sheath if you send them your knife's dimensions.
(© Michael Pendley photo)