Building a Better Duck Dog, Part II
Posted 2016-08-25T10:30:00Z by
Training single-mark retrieves on land and water

Before we get into single marks — that is, situations when a dog sees the bird fall, remembers the fall and goes to retrieve the bird on command — let's make sure you're not jumping the gun on training.
First, your dog must have the basics down cold. That means it needs to be solid on sit, stay and heel, as well as conditioned to retrieve — that is, force fetched. If you have zero experience in force-fetch training, let a professional handle it. There are countless benefits to a dog that's force fetched and just as many ways to screw it up. When in doubt, let a pro sort it out.
One such pro trainer is Joe Nowakowski, owner of Little River Kennels in Bozeman, Montana. He stresses that teaching marked retrieves is mechanical, and that you must cover basics thoroughly before throwing the first mark for your dog.
If any facet of basics (sit, heel, come, stay) are rushed or glossed over, problems will most assuredly manifest later in training, he said.
Nowakowski said that's especially true with the sit command. If a dog breaks and leaves the line before being released, that's because it was not properly trained to sit. To make a truly steady dog, you must constantly drill into them that sit means sit despite distraction from other dogs, noises or people. Nowakowski stresses that sit training and all other basics should be performed and solidified before any serious marking drills. Also, when marking drills begin, the fun bumpers tossed by children or friends in the yard must stop, as well as tossing sticks, tennis balls and whatever else you've been doing for fun with your pup.
Stand Alones
The stand-alone mark is the first step in marked-retrieve training. A stand-alone drill works just like it sounds. The thrower (you) stands alone in a field in front of your dog, which is made to sit alone. To help the dog sit in its place, use a mat or even a tire with a piece of plywood covered in carpet on top. That gives the dog a sense of where it needs to be and will aid you later in training place, to be covered in Part III, when we'll discuss casting drills. Because the stand-alone drill is your dog's introduction to marking, make sure you're in a flat, low-cut area. You want the dog to see the mark land so it has zero chances of failure because of line of sight. Now the fun begins. Get your dog's attention by spinning the bumper and saying, Hup, hup, hup, and then give it a toss — not too far, but far enough from you so the dog is not distracted by your presence.
After the bumper lands, release your dog on the fetch command. When the dog retrieves the bumper, call him to heel with a whistle blast and a, Here, here, here. Make sure to praise the pup heavily on a job well done. Run this drill a few times, and then take a break for the day. That will keep your pup engaged so it won't get bored with the drill.
Also, Nowakowski said you must address an important pitfall. If your dog breaks from the line before you give the fetch command, never — under any circumstances — allow it to get the bumper. Stop your dog on a whistle, and retrieve the bumper yourself. This shows the dog there's no reward in breaking.
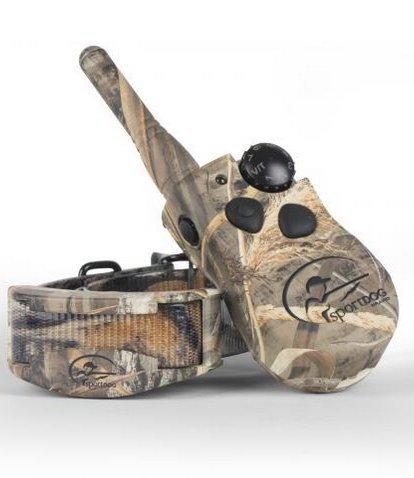 SportDOG WetlandHunter 425 E-Collar System
After your dog has completed several stand-alone drills without breaking, balking or failing to come to heel, it's time to move on. To do that, you'll need some additions to your training livery.
Get Help
When you've passed the initial hurdle of stand-alone retrieves, you need to enlist the help of someone willing to toss a few bumpers and help you with dog work. Children, wives and buddies are great for this. Even better is having a buddy who is working a dog that can help you out.
With your thrower about 30 to 50 yards in front of you — again, in a flat, clean area — have him toss the birds after giving a, Hup, hup, hup to get the dog's attention. After a few successful retrieves, move back 50 yards or so, stretching your dog out to 100 yards. If your dog fails to run directly to the bird or seems confused, close the distance, and run the drill again. Try to avoid too many corrections. If your dog seems to become lackadaisical or disinterested, it's a good idea to stop training. Fifteen minutes is about right — or seems to be with my dog — when working with one behavior, but opinions vary.
When your dog is solidly retrieving to hand in a scenario where it can see where the bird lands, it's time to move into light cover. For this drill, tall grass will work. You just want the dummy hidden from sight when it falls. Remember to keep early drills easy, but don't help your dog find a downed bird. If a bird is thrown into cover, the dog will mark it, but a young dog might not be spot-on the mark every time. In that case, the dog must hunt for the bird. Encourage it to do so, maybe walking out toward the bird but never directly to the bird. Do not point it out for the dog. Let it find the bird on its own.
Water Marks
Training your dog on single water marks is a lot like land training. You want your dog to focus on marking and retrieving, but you're throwing water into the mix. When starting with water marks, Nowakowski stressed having a scenario in which it's impossible for the dog to cheat — that is, to run the bank before entering the water or exit the water onto land at a point other than where it entered. This type of training scenario is best accomplished in the center of a long, straight lake bank, making it unattractive for the dog to swim over and run the bank in either direction. Again, a partner or a remote dummy launcher is ideal for water-mark training. I like a remote launcher, as I can have multiple launchers set at various areas yet controlled from one remote. The other option has always been using two nephews, but their attention span is slightly shorter than my dog's, so I often opt for electronics.
When you begin water marks, make the first throws short, just off the bank and into the water. Water is a new element introduced into marking and you want to keep the dog's interest and confidence up. After your pup gets the idea of entering the water, grabbing the bird and returning to your side, you can gradually lengthen your water mark to 75 to 100 yards. As with land marks, keep distractions and corrections to a minimum. There will be plenty of time to add those into the training matrix later.
When your dog is solid on single marks on land and in water, it's time to move on and begin multiple marks and lining drills. Training for single and multiple marks and lining drills are bottomless topics, and experts have written books on both subjects, my favorite being Training Drills for Marking, by James Spencer. Although Spencer's book is a valuable resource, if you're not comfortable or lack the time necessary to train your pup, a professional trainer is worth his weight in gold.
Author's note: Next in this three-part series, we'll discuss what it takes to begin the blind-retrieve matrix, casting drills and why most people should be shocked with their own collar. If you have questions or comments, please post them on the Realtree's Facebook page or below in the comments section. And click here for more Realtree waterfowl hunting content.